写在前边
考虑到很多生产环境是内网,不允许外网访问的。恰好我司正是这种场景,写一篇二进制方式安装Docker的教程,用来帮助实施同事解决容器部署的第一个难关。
本文将以二进制安装方式,在CentOS7.9上安装Docker 19.03.9,具有一定的通用性,其他版本也可参考本文。让我们开始吧。
适合场景
- 无法访问外网的服务器环境
- 内网没有Docker软件源
- 需要离线安装Docker
- 使用rpm或deb等Docker安装包出现依赖地狱的情况,而实施人员无力解决
- 支持Systemd服务配置
- 支持多种架构:aarch64/armel/armhf/ppc64le/s390x/x86_64
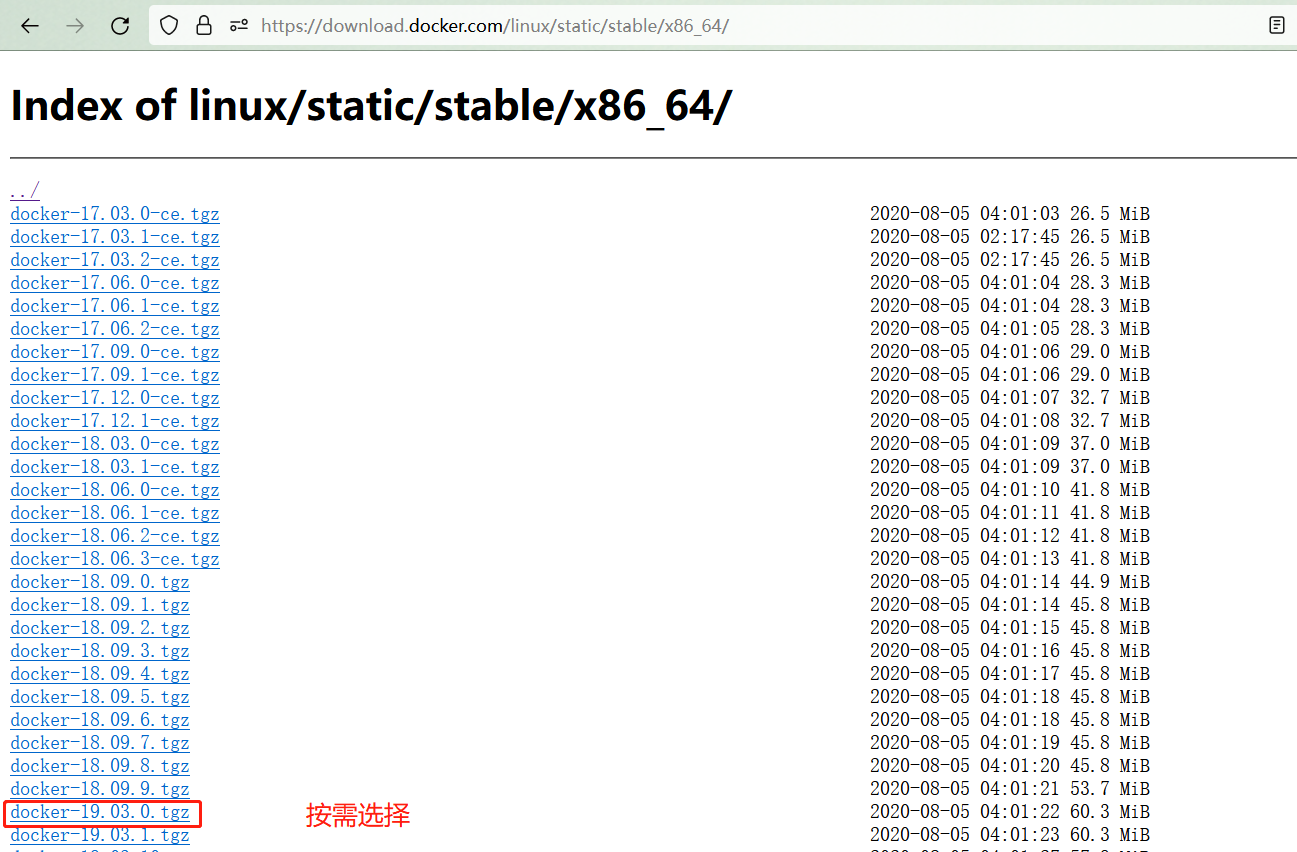
下载Docker二进制包
https://download.docker.com/linux/static/stable/ ,根据架构选择目录,本文以x86_64举例

将压缩包上传到服务器
二进制安装Docker
在服务器上,解压压缩包
tar -xvf docker-19.03.0-ce.tgz
将解压出的docker/bin目录下的可执行文件复制到/usr/bin
cp docker/* /usr/bin/
将docker注册为 Systemd 的 service
cat > /etc/systemd/system/docker.service <<EOF
[Unit]
Description=Docker Application Container Engine
Documentation=https://docs.docker.com
After=network-online.target firewalld.service
Wants=network-online.target
[Service]
Type=notify
# the default is not to use systemd for cgroups because the delegate issues still
# exists and systemd currently does not support the cgroup feature set required
# for containers run by docker
ExecStart=/usr/bin/dockerd
ExecReload=/bin/kill -s HUP $MAINPID
# Having non-zero Limit*s causes performance problems due to accounting overhead
# in the kernel. We recommend using cgroups to do container-local accounting.
LimitNOFILE=infinity
LimitNPROC=infinity
LimitCORE=infinity
# Uncomment TasksMax if your systemd version supports it.
# Only systemd 226 and above support this version.
#TasksMax=infinity
TimeoutStartSec=0
# set delegate yes so that systemd does not reset the cgroups of docker containers
Delegate=yes
# kill only the docker process, not all processes in the cgroup
KillMode=process
# restart the docker process if it exits prematurely
Restart=on-failure
StartLimitBurst=3
StartLimitInterval=60s
[Install]
WantedBy=multi-user.target
EOF
为 docker.service添加可执行权限
chmod +x /etc/systemd/system/docker.service
设置docker存储目录到大硬盘目录、设置私有镜像仓库地址(可选,注意替换目录位置与私有镜像仓库URL)
mkdir /etc/docker
mkdir /data1/docker #/data1是大硬盘目录
# 主要关注data-root的值是大硬盘目录存放docker相关文件的目录
# insecure-registries后边的值是私有镜像仓库地址,多个私有镜像仓库地址配置格式为["仓库1","仓库2"]
# exec-opts部分针对于部署k8s做的预配置,可以减少容器日志保存大小及配合kubelet使用systemd
cat > /etc/docker/daemon.json <<EOF
{
"insecure-registries":["10.2.41.191:5000"],
"data-root":"/data1/docker",
"exec-opts": ["native.cgroupdriver=systemd"],
  "log-driver": "json-file",
  "log-opts": {
    "max-size": "20m"
  },
  "storage-driver": "overlay2",
  "storage-opts": [
    "overlay2.override_kernel_check=true"
  ]
}
EOF
启动docker并设置开机自启
systemctl daemon-reload
systemctl enable --now docker.service
验证安装结果
systemctl status docker #查看docker服务状态
docker -v #查看docker版本
本文同步发布在本人CSDN https://blog.csdn.net/u012586326 与 博客园 https://www.cnblogs.com/hellxz/ ,禁止爬虫与未经允许的洗稿。
标签:

留言评论